Click on the picture to go to the Flickr page which has notes.
Monday, May 15, 2006
Friday, May 12, 2006
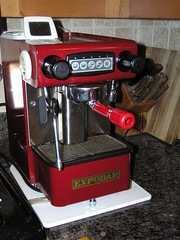
Machine Modifications
I want to try to list out anything I have done with the machine since I got it:
Replacing the steam tip (with the 2 hole 30 degree from www.espressoparts.com)
Replace the Hi-limit thermostat, and the wiring to it.
Replace pressurestat (the original Signal Lux microswitch failed)
Heating Element Replacement
Last Saturday I heard an odd ‘Click!’ in my kitchen. I found that the GFCI outlet that my Expobar Office Control was plugged into had tripped. Unable to reset it, I found that the breaker for that circuit had tripped as well. Once I reset both of them, I tried plugging in the espresso machine and turning it on. Everything seemed normal, except the thermometer that I use to monitor the boiler temp was indicating the boiler was not heating. I checked the hi-limit thermostat on top of the boiler: that was normal. I checked to make sure the pressurestat and associated relay were working- they also were normal. I emptied the boiler as much as possible- Since the boiler was not heating I had no steam pressure to force the water out of the hot water outlet, so I opened both the water valve and steam valves, held the vacuum breaker closed and blew in the steam wand to force out the water. I removed the bottom panel and tried to measure the resistance of the heating element, but it read as an open circuit- Bingo!
 On Monday I called Bill at www.espressomachineparts.com and ordered a new heating element along with some new group gaskets and dispersion screw. It was a very reasonable price (the element was literally half the price I was quoted at another source), excellent service, and I got the parts via ups on Wednesday.
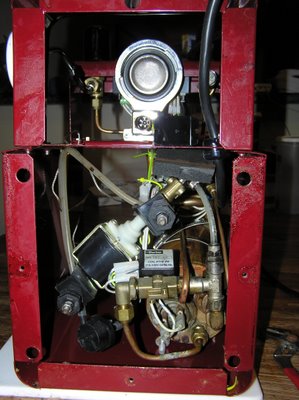
To remove the element I needed to bring the boiler down past the frame of the machine, which meant I disconnected the tubes that feed the group (at the backside of the group) and disconnected the hot water and steam valves. I didn't disassemble any more because I didn't want to mess with the pump and wiring at this point. THe tricky part with all these fittings in getting enough leverage to get them to turn. I wedged the handle of some channellock pliers between two other fittings to get the element to start. The inside looked pretty clean, which was encouraging since I don't descale very often, I just drain the boiler and refill with new distilled water each week.
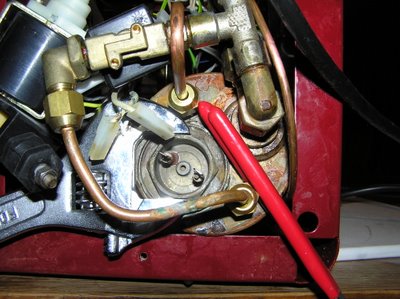
Dead element:
 Best picture I could get inside the boiler:
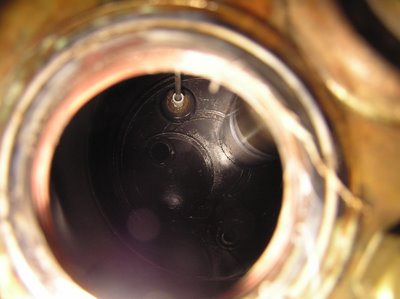
Last Saturday I heard an odd ‘Click!’ in my kitchen. I found that the GFCI outlet that my Expobar Office Control was plugged into had tripped. Unable to reset it, I found that the breaker for that circuit had tripped as well. Once I reset both of them, I tried plugging in the espresso machine and turning it on. Everything seemed normal, except the thermometer that I use to monitor the boiler temp was indicating the boiler was not heating. I checked the hi-limit thermostat on top of the boiler: that was normal. I checked to make sure the pressurestat and associated relay were working- they also were normal. I emptied the boiler as much as possible- Since the boiler was not heating I had no steam pressure to force the water out of the hot water outlet, so I opened both the water valve and steam valves, held the vacuum breaker closed and blew in the steam wand to force out the water. I removed the bottom panel and tried to measure the resistance of the heating element, but it read as an open circuit- Bingo!
On Monday I called Bill at www.espressomachineparts.com and ordered a new heating element along with some new group gaskets and dispersion screw. It was a very reasonable price (the element was literally half the price I was quoted at another source), excellent service, and I got the parts via ups on Wednesday.To remove the element I needed to bring the boiler down past the frame of the machine, which meant I disconnected the tubes that feed the group (at the backside of the group) and disconnected the hot water and steam valves. I didn't disassemble any more because I didn't want to mess with the pump and wiring at this point. THe tricky part with all these fittings in getting enough leverage to get them to turn. I wedged the handle of some channellock pliers between two other fittings to get the element to start. The inside looked pretty clean, which was encouraging since I don't descale very often, I just drain the boiler and refill with new distilled water each week.
Dead element:
Best picture I could get inside the boiler:The level probe is at the top, and the heat exchanger is the pipe running through the boiler at the upper right. The other openings at the top are for the vacuum breaker, and the steam wand/pressurestat line.
I got so excited when the element arrived I didn't take pictures before screwing that puppy in!
After reassembling everything, it took two trial start-ups before I got everything tightened up with no leaks, but it was back in service Friday morning.
Subscribe to:
Posts (Atom)
